kpeek
![]()
![]()
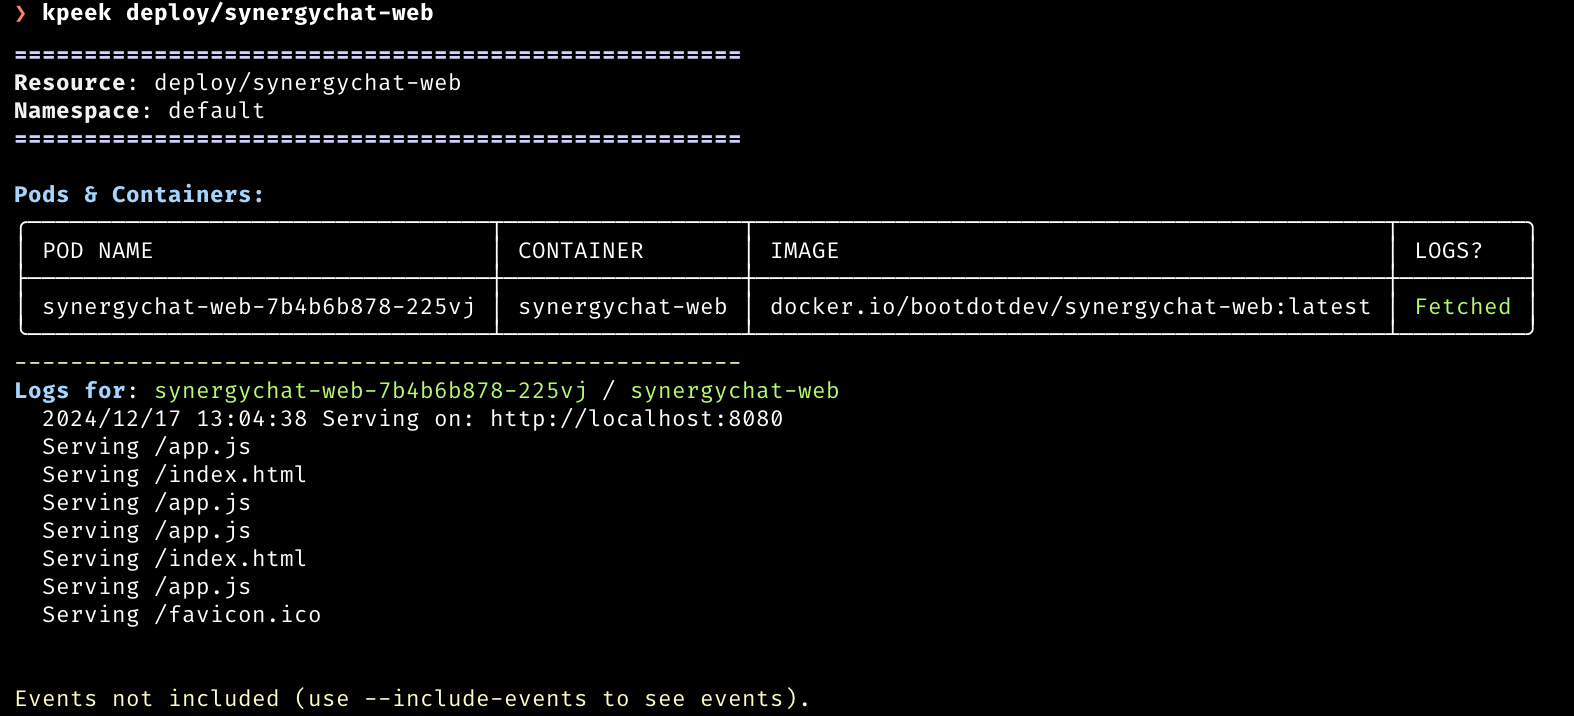
kpeek is a command-line tool that aggregates describe output, container logs, and (optionally) events for a given Kubernetes resource. It simplifies debugging and provides a clean, colorized, human-readable report.
Features
- Describe-like Output: Quickly see essential details for a Pod or Deployment.
- Pod Discovery: If you provide a Deployment,
kpeekfinds its Pods automatically. - Logs (Optional): View logs from each container in your Pods with color highlighting.
- Events (Optional): Fetch resource-level and Pod-level events in a concise table.
- JSON Output: Switch to machine-readable JSON for automated processing.
Installation
Using Go Install
go install github.com/hacktivist123/kpeek@latest
[!NOTE]
- The above command does not embed an official release version in the binary. If you run
kpeek updateand your local version is unrecognized, kpeek may always see itself as outdated. You can still successfully update to the latest release, but your local binary won’t display an exact version string.- You might need to add
$HOME/go/binto Your$PATHafter installation
Pre-Compiled Binaries
For an officially versioned kpeek build, download a pre-built release binary. Place it in your PATH, and you’ll have the correct version string for self-updates.
Build From Source (with Version Injection)
git clone https://github.com/hacktivist123/kpeek.git
cd kpeek
go build -ldflags "-X github.com/hacktivist123/kpeek/cmd.version=v0.7.0" -o kpeek .
./kpeek --help
[!NOTE] Replace
v0.7.0with the appropriate release version. This approach embeds the release version in the binary, which ensures that commands like kpeek update correctly compare the local version with the latest release.
- Run With
go run
git clone https://github.com/hacktivist123/kpeek.git
cd kpeek
go run main.go --help
Usage
kpeek [resource/type-name] [flags]
Flags
| Flag | Purpose |
|---|---|
n, --namespace string |
Kubernetes namespace of the resource (default: default). |
--json |
Output in JSON format. |
--no-logs |
Skip retrieving container logs. |
--include-events |
Include events in the output. |
--log-tail int |
Display only the last N lines of logs (0 for all) |
--log-regex |
Regular expression to filter log lines |
How to Update
kpeek includes a built-in command that checks GitHub for a newer release and updates the local binary if one is found. To use it, simply run:
kpeek update
If a newer version is available, kpeek will automatically download the latest release and replace your current binary. This makes staying up-to-date easy and requires no manual download or reinstallation.
Running kpeek as a kubectl Plugin
kpeek is designed to work seamlessly as a standalone CLI tool—but you can also run it as a kubectl plugin for a more native Kubernetes experience. Follow the steps below to set up and use kpeek as a kubectl plugin.
Installation Steps
-
Build or Download kpeek
-
Build from Source:
Run the following command in your kpeek project directory:go build -o kpeek . -
Download Pre-Built Binary:
Alternatively, download the latest release binary from our GitHub Releases.
-
-
Rename the Binary
Kubectl recognizes plugins by thekubectl-prefix. Rename the kpeek binary:mv kpeek kubectl-kpeek -
Place the Plugin in Your PATH
Ensure that the directory containing kubectl-kpeek is in your system’s PATH. For example, you can move it to /usr/local/bin:
sudo mv kubectl-kpeek /usr/local/bin/If you prefer a custom directory, add that directory to your PATH in your shell configuration file (e.g., .bashrc or .zshrc).
-
Verify Installation
Run the following command to ensure kubectl discovers the plugin:
kubectl kpeek --helpYou should see the kpeek help output, which confirms that the plugin is correctly installed.
Additional Tips
-
Pre-Built Binaries: If you download a pre-built binary from GitHub releases, remember to rename it to kubectl-kpeek before moving it to a directory in your $PATH.
-
Plugin Discovery: Kubectl automatically discovers any executable named with the kubectl- prefix. No further configuration is necessary, but you can optionally create a plugin configuration file at $HOME/.kube/plugins.yaml if you want to document your installed plugins.
-
Flag Compatibility: All the flags available in the standalone kpeek (e.g., –no-logs, –include-events, –log-tail, –log-regex) work exactly the same when you run kpeek as a kubectl plugin.
Contributing
- Fork this repository and clone your fork.
- Create a feature branch: git checkout -b feature/my-feature
- Make changes and commit: git commit -m ‘Add my feature’
- Push to your fork: git push origin feature/my-feature
- Open a Pull Request describing your changes.
All contributions, bug reports, bug fixes, documentation improvements, enhancements, and ideas are welcome.
License
This project is licensed under the MIT License. See the LICENSE file for details.