How to deploy a Docusaurus site to GitHub Pages
In this tutorial, you'll see how to deploy a Docusaurus website to GitHub Pages. This tutorial is intended for technical writers and developers who want to publish their documentation sites. It assumes you have knowledge of:
- Basic Git commands
- GitHub repositories
- Command-line interfaces
- Markdown syntax
By the end of this tutorial, you'll have seen how to:
- Configure your Docusaurus site for GitHub Pages deployment
- Deploy manually using the
yarn deploycommand - Automate deployments with GitHub Actions
- Verify your deployed site is live
Background
GitHub Pages is a static site hosting service that takes files from a GitHub repository and publishes them as a website. Docusaurus is a static site generator that works seamlessly with GitHub Pages, making it an excellent choice for hosting documentation sites.
There are two ways to deploy a Docusaurus site to GitHub Pages:
- Manual deployment using the
yarn deploycommand, which builds your site and pushes it to agh-pagesbranch - Automated deployment using GitHub Actions, which automatically deploys your site whenever you push changes to your main branch
Before you start
Before you start the tutorial, you should:
- Have Node.js version 20.0 or above installed on your machine
- Have the Yarn package manager installed
- Have a GitHub account with a repository containing your Docusaurus project
- Have Git configured locally so you can pull and push to GitHub
- Have your Docusaurus site running locally (verify with
yarn start)
GitHub Pages is only available for public repositories on free GitHub accounts. If your repository is private, you'll need a GitHub Enterprise Cloud or GitHub Enterprise Server account to use GitHub Pages. Alternatively, you can make your repository public to use GitHub Pages for free.
Configure Docusaurus for GitHub Pages
Before deploying, you need to configure your docusaurus.config.ts file with your GitHub Pages settings.
-
Open the
docusaurus.config.tsfile in your project root directory. -
Locate the deployment configuration section and update the following fields:
// Set the production url of your site here
url: 'https://your-github-username.github.io',
// Set the /<baseUrl>/ pathname under which your site is served
// For GitHub Pages deployment, it is often '/<projectName>/'
baseUrl: '/your-repository-name/',

// GitHub Pages deployment config.
// If you aren't using GitHub Pages, you don't need these.
organizationName: 'your-github-username', // Usually your GitHub org/user name.
projectName: 'your-repository-name', // Usually your repo name. -
Replace the placeholder values with your actual GitHub username and repository name. For example, if your GitHub username is
hacktivist123and your repository is namedgithub-usaurus, your configuration should look like:url: 'https://hacktivist123.github.io',
baseUrl: '/github-usaurus/',
organizationName: 'hacktivist123',
projectName: 'github-usaurus', -
Save the file.
Test your build locally
Before deploying to GitHub Pages, it's good practice to test your build locally to catch any errors.
-
Build your site:
yarn buildThis command generates static content into the
builddirectory. If there are any build errors, they'll appear here. -
Serve the built site locally:
yarn serveThis serves the production build locally, allowing you to preview exactly what will be deployed. By default, it runs at http://localhost:3000/.
-
Open your browser and verify that all pages load correctly and links work as expected.
-
Press
Ctrl+Cin your terminal to stop the local server.
If the build completes successfully and the site looks correct locally, you're ready to deploy to GitHub Pages.
Method 1: Manual deployment with yarn deploy
This method is useful for quick, one-off deployments or when you want full control over when your site is published. The yarn deploy command will automatically create a gh-pages branch in your repository if one doesn't already exist.
gh-pages is the default branch name that Docusaurus uses for deployment. You can customize this by setting the deploymentBranch property in your docusaurus.config.ts file or using the DEPLOYMENT_BRANCH environment variable. When you configure GitHub Pages later in this tutorial, you'll need to select whichever branch name you're using for deployment.
Set up environment variables
The deployment command requires two environment variables to authenticate and identify you.
-
Create a GitHub personal access token by visiting GitHub's token creation page.
-
Grant the token
packagescope (full control of private repositories) and Generate the token.
-
Copy your token and set the
NPM_GITHUB_AUTH_TOKENenvironment variable in your terminal:export NPM_GITHUB_AUTH_TOKEN="your-personal-access-token" -
Set the
GIT_USERenvironment variable to your GitHub username:export GIT_USER="your-github-username"tipAdd these export commands to your shell profile (
.bashrc,.zshrc, or.bash_profile) to avoid setting them every time you open a new terminal.
Deploy the site
-
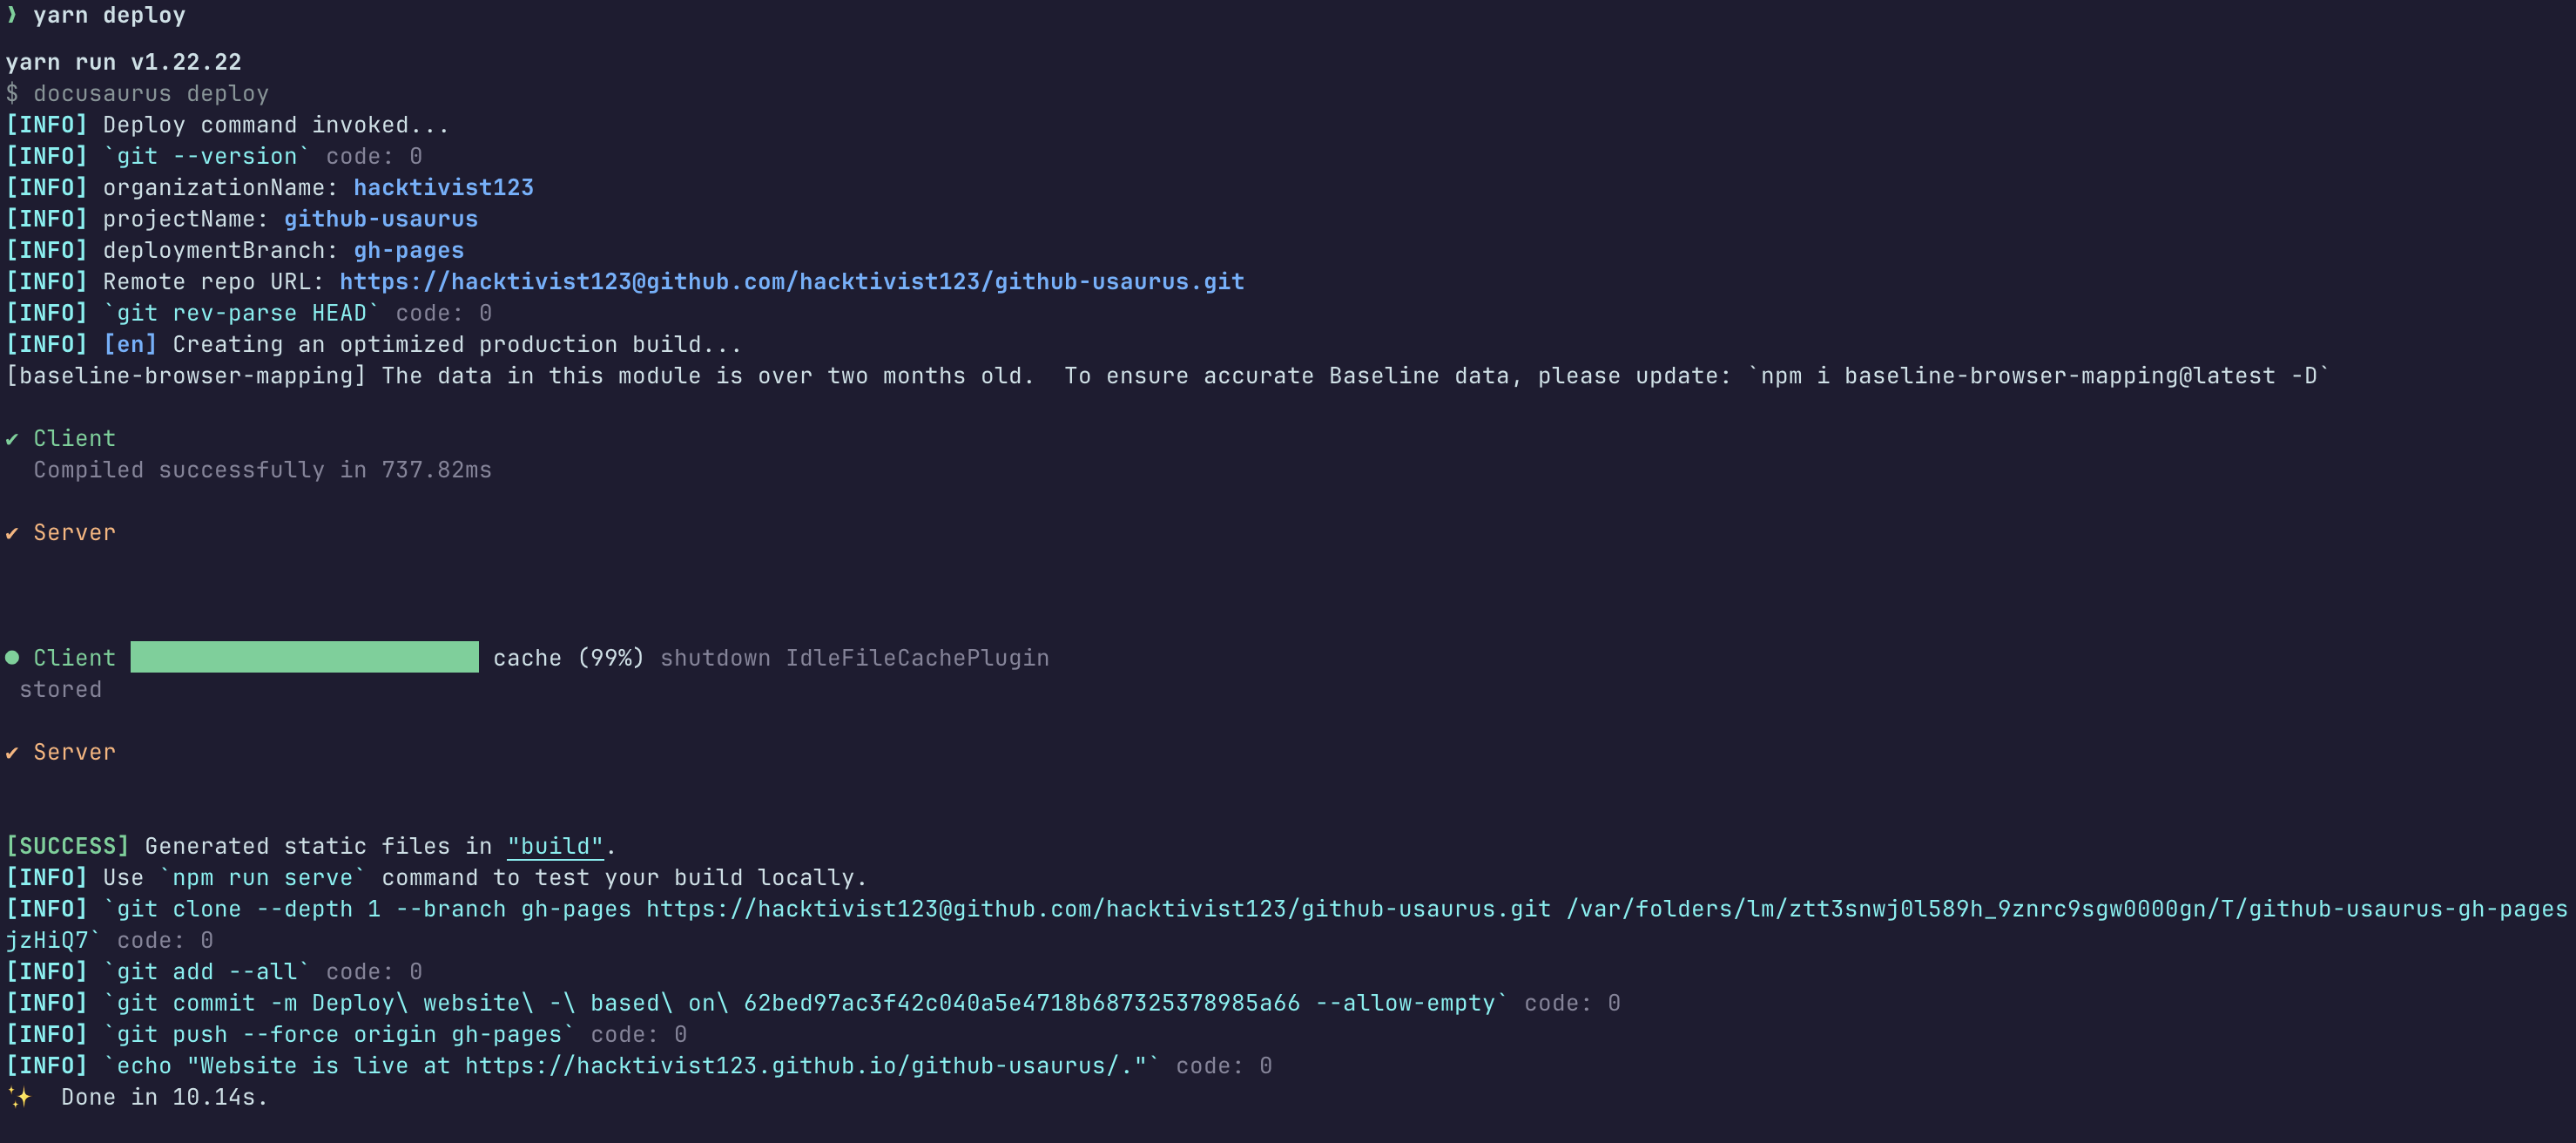
In the main branch, run the deployment command to build your site and push the built files to the
gh-pagesbranch:yarn deploy
This will build your site and push the built files to the gh-pages branch.
-
Wait for the command to complete. You should see output confirming the deployment was successful.
Enable GitHub Pages
After your first yarn deploy, you need to configure GitHub Pages to serve your site from the gh-pages branch. This is a one-time setup, future deployments will automatically update your site.
-
Navigate to your repository on GitHub.
-
Click Settings in the repository menu.
-
Click Pages in the left sidebar.
-
Under Source, select Deploy from a branch.
-
Under Branch, select gh-pages and / (root), then click Save.
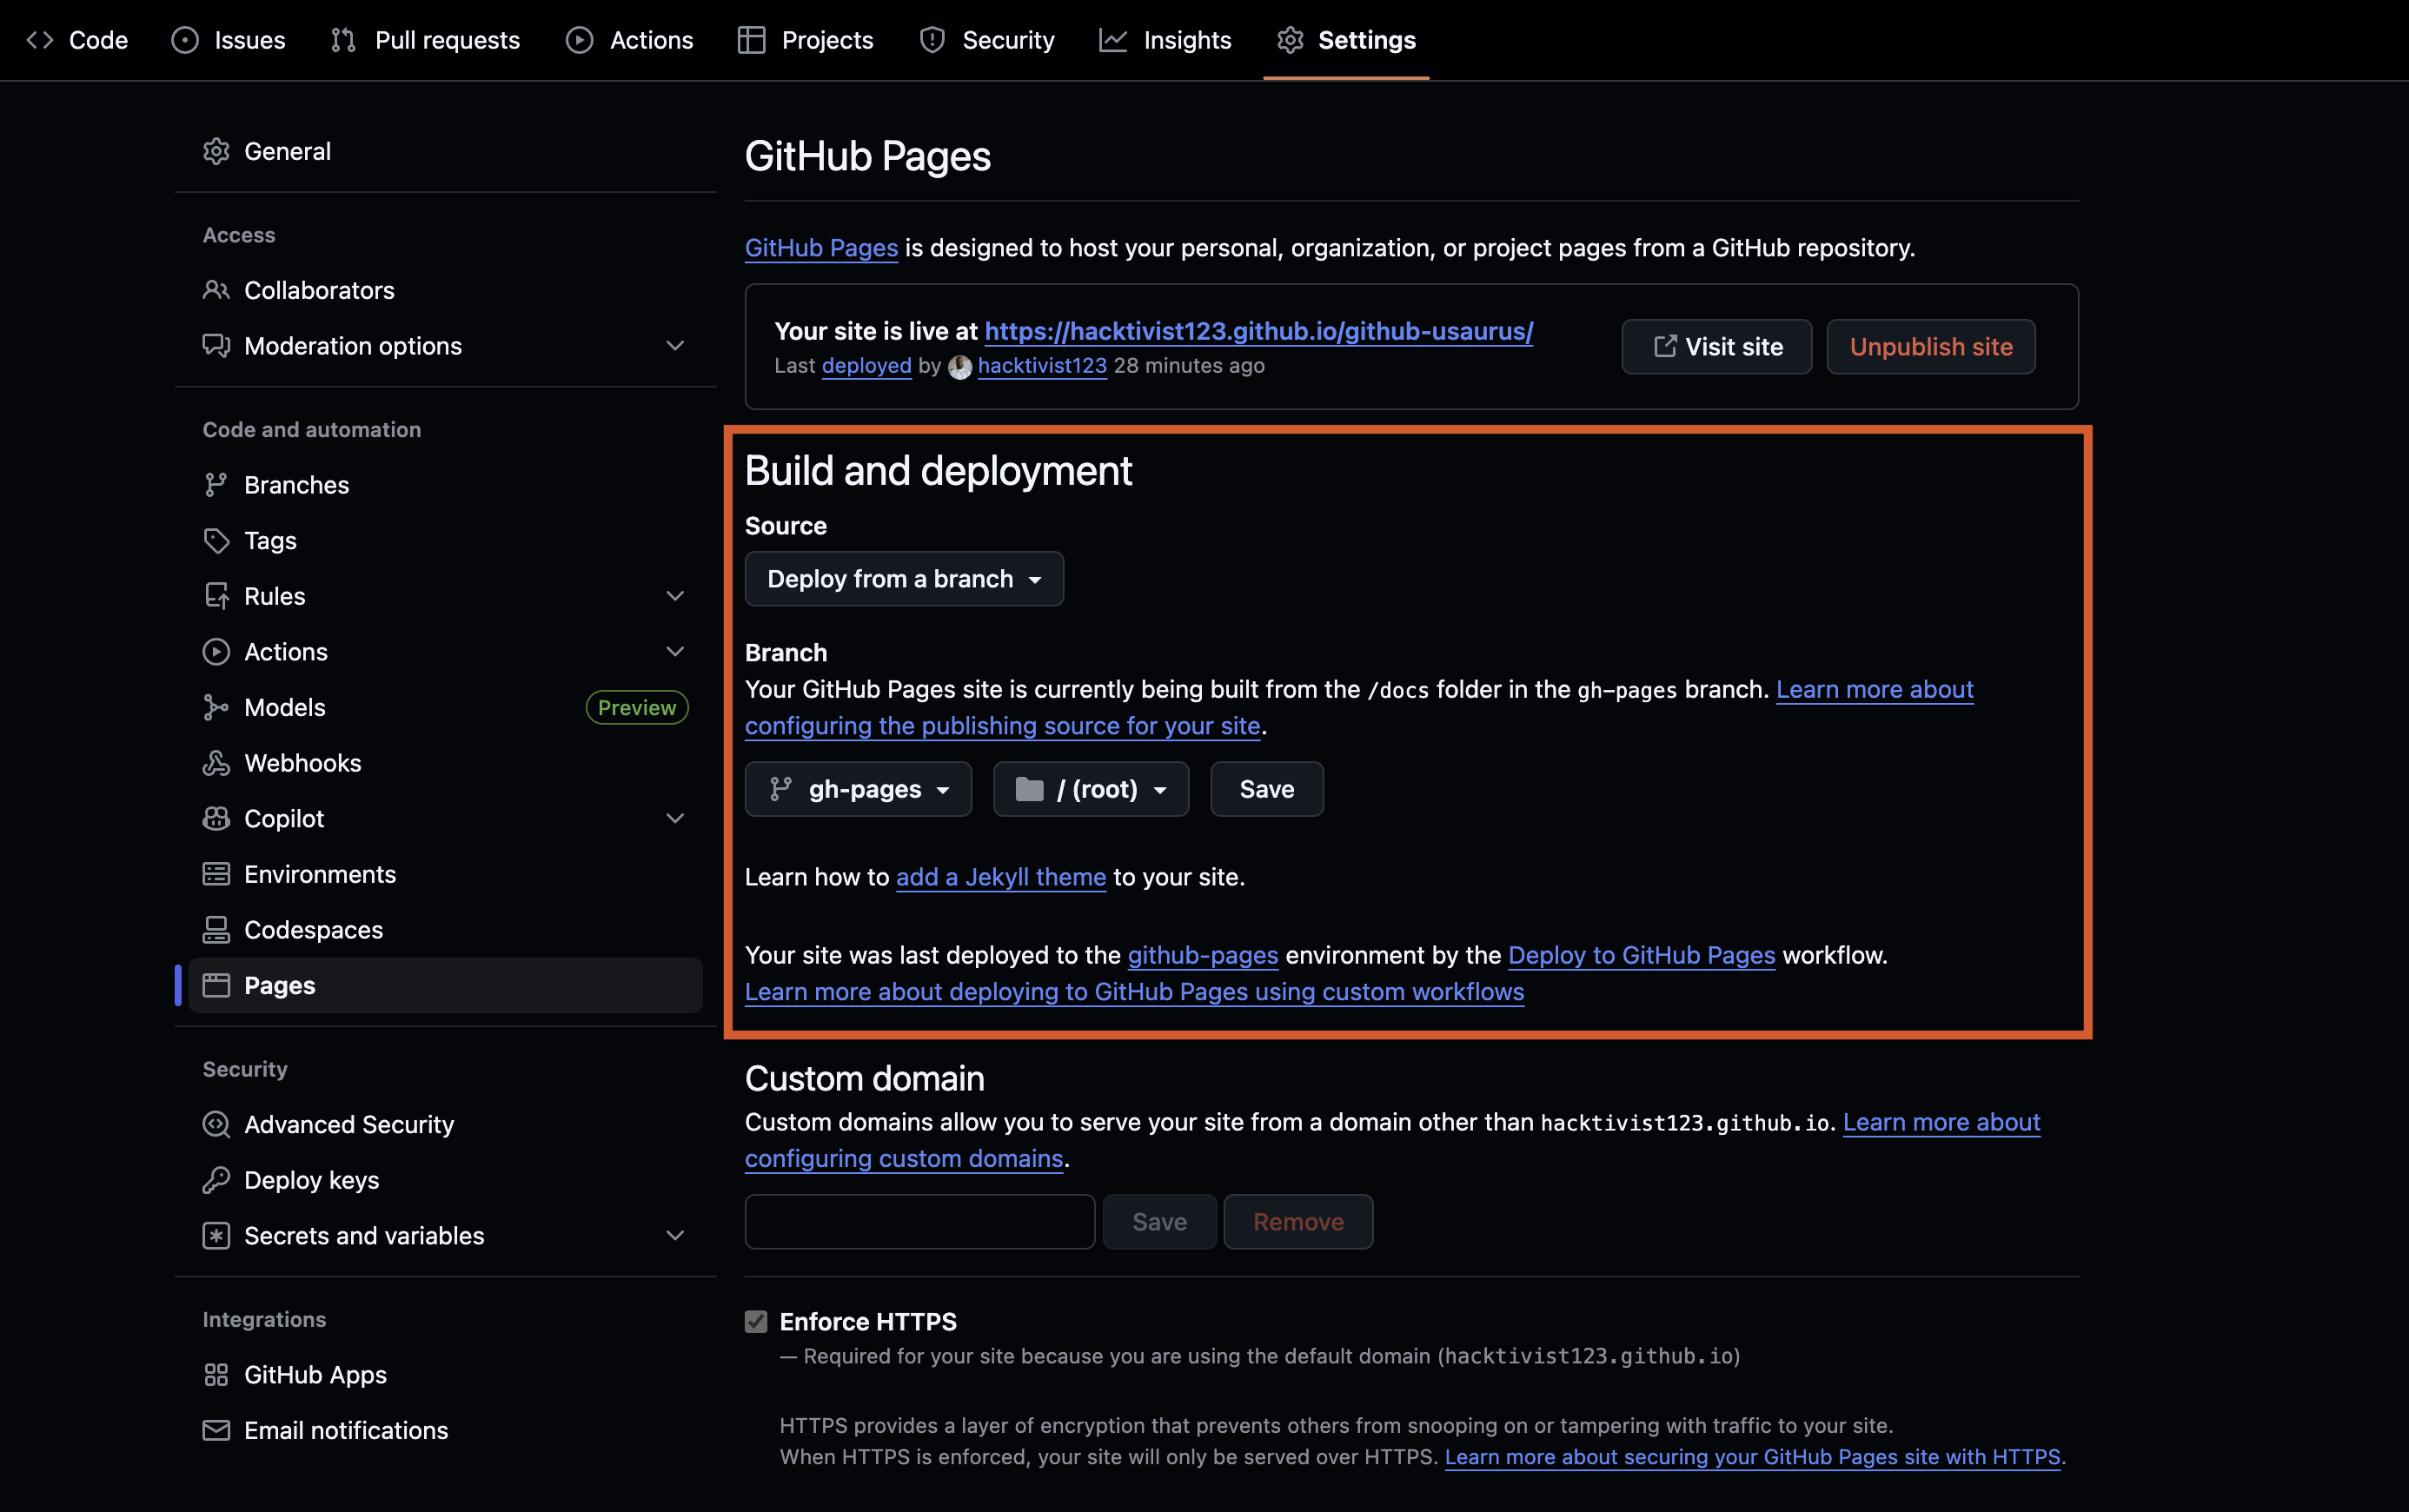
-
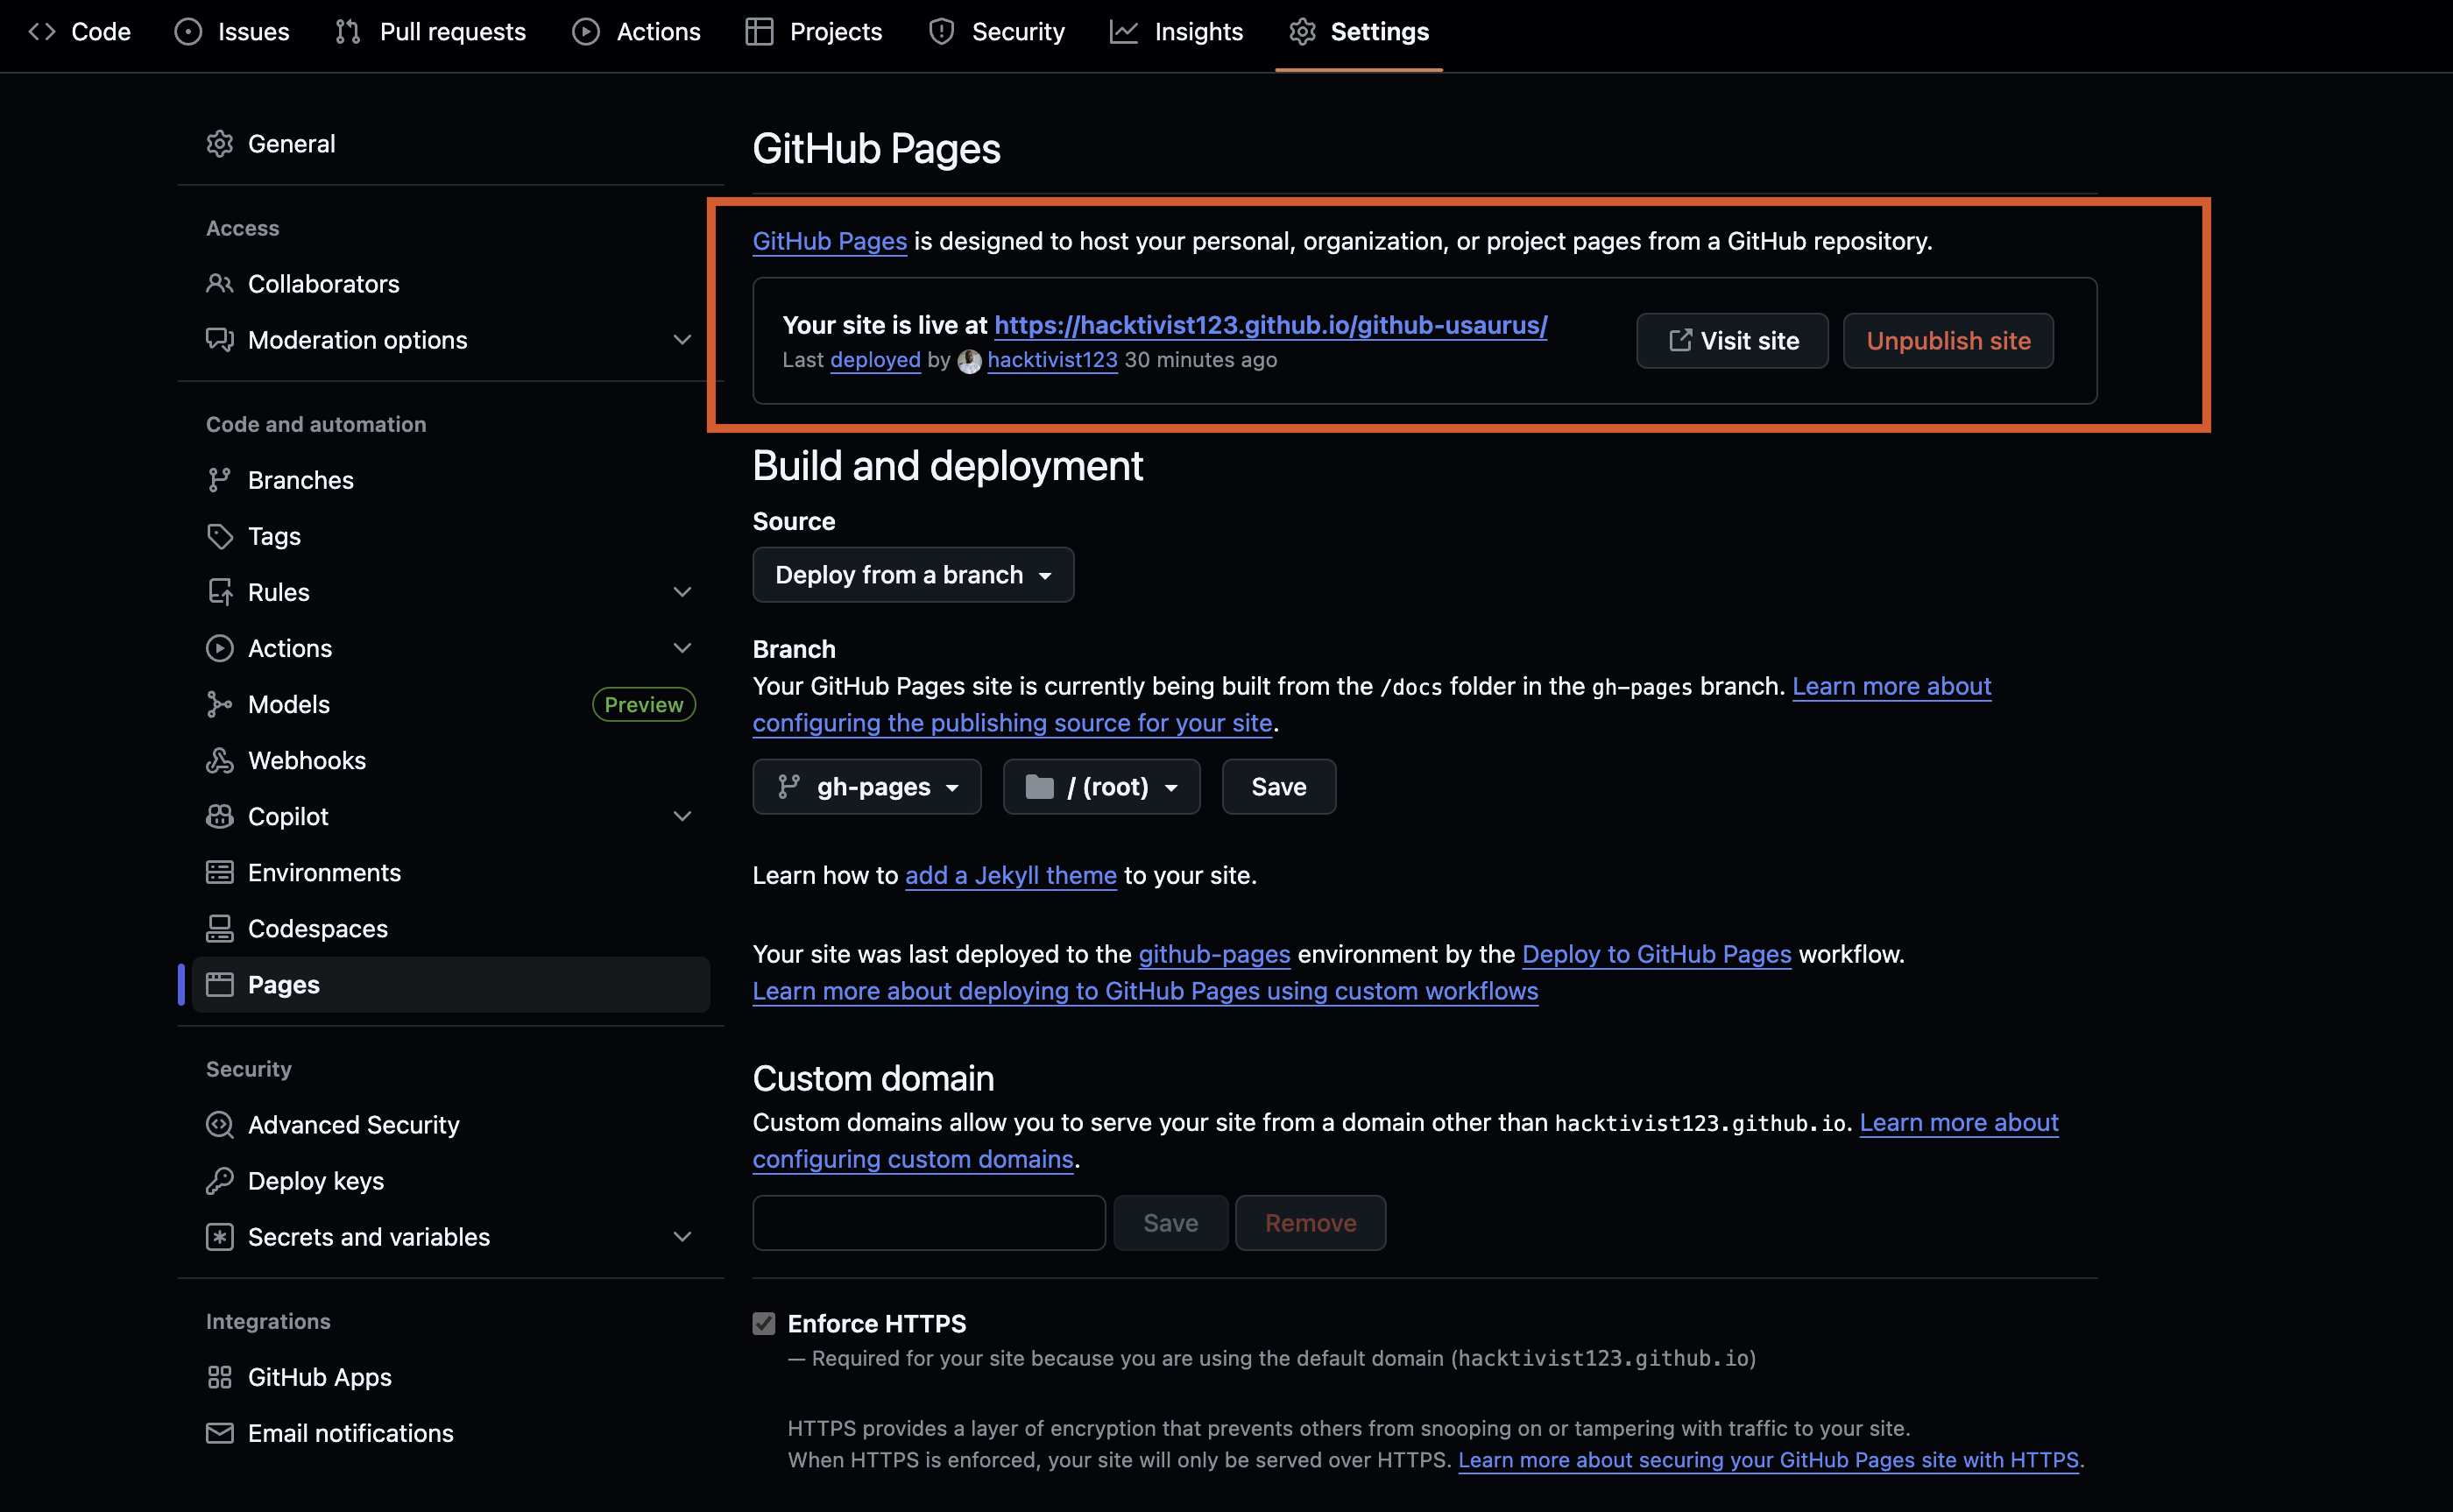
GitHub will display a message indicating your site is being deployed. Wait a few minutes for the deployment to complete.
-
Once deployed, GitHub will display your site's URL at the top of the Pages settings. Click the Visit site button to view your published documentation.
After this initial setup, you can simply run yarn deploy whenever you want to publish changes - you won't need to touch the GitHub Pages settings again.
Method 2: Automated deployment with GitHub Actions
This method uses GitHub Actions to automatically deploy your site whenever you push changes to your main branch. GitHub Actions is a continuous integration and continuous delivery (CI/CD) platform that automates the build and deployment process, keeping your site up-to-date without manual intervention.
If you've already set up Method 1 and want to switch to GitHub Actions, you can do so without any conflicts. Simply follow the steps below to set up the workflow, then change your GitHub Pages source from "Deploy from a branch" to "GitHub Actions" in your repository settings. Your existing gh-pages branch can remain in your repository but won't be used anymore.
Set up GitHub Actions workflow
-
Create a
.github/workflowsdirectory in your project root if it doesn't already exist:mkdir -p .github/workflows -
Create a new file named
deploy.yamlinside theworkflowsdirectory. -
Add the following workflow configuration:
name: Deploy to GitHub Pages

on:
  push:
    branches:
      - main

jobs:
  build:
    name: Build Docusaurus
    runs-on: ubuntu-latest
    steps:
      - uses: actions/checkout@v4
        with:
          fetch-depth: 0
      - uses: actions/setup-node@v4
        with:
          node-version: 20
          cache: yarn

      - name: Install dependencies
        run: yarn install
      - name: Build Docs
        run: yarn build

      - name: Upload Build Artifact
        uses: actions/upload-pages-artifact@v3
        with:
          path: build

  deploy:
    name: Deploy to GitHub Pages
    needs: build

    permissions:
      pages: write
      id-token: write

    environment:
      name: github-pages
      url: ${{ steps.deployment.outputs.page_url }}

    runs-on: ubuntu-latest
    steps:
      - name: Deploy to GitHub Pages
        id: deployment
uses: actions/deploy-pages@v4 -
Save the file.
Configure repository permissions
-
Navigate to your repository on GitHub.
-
Click Settings in the repository menu.
-
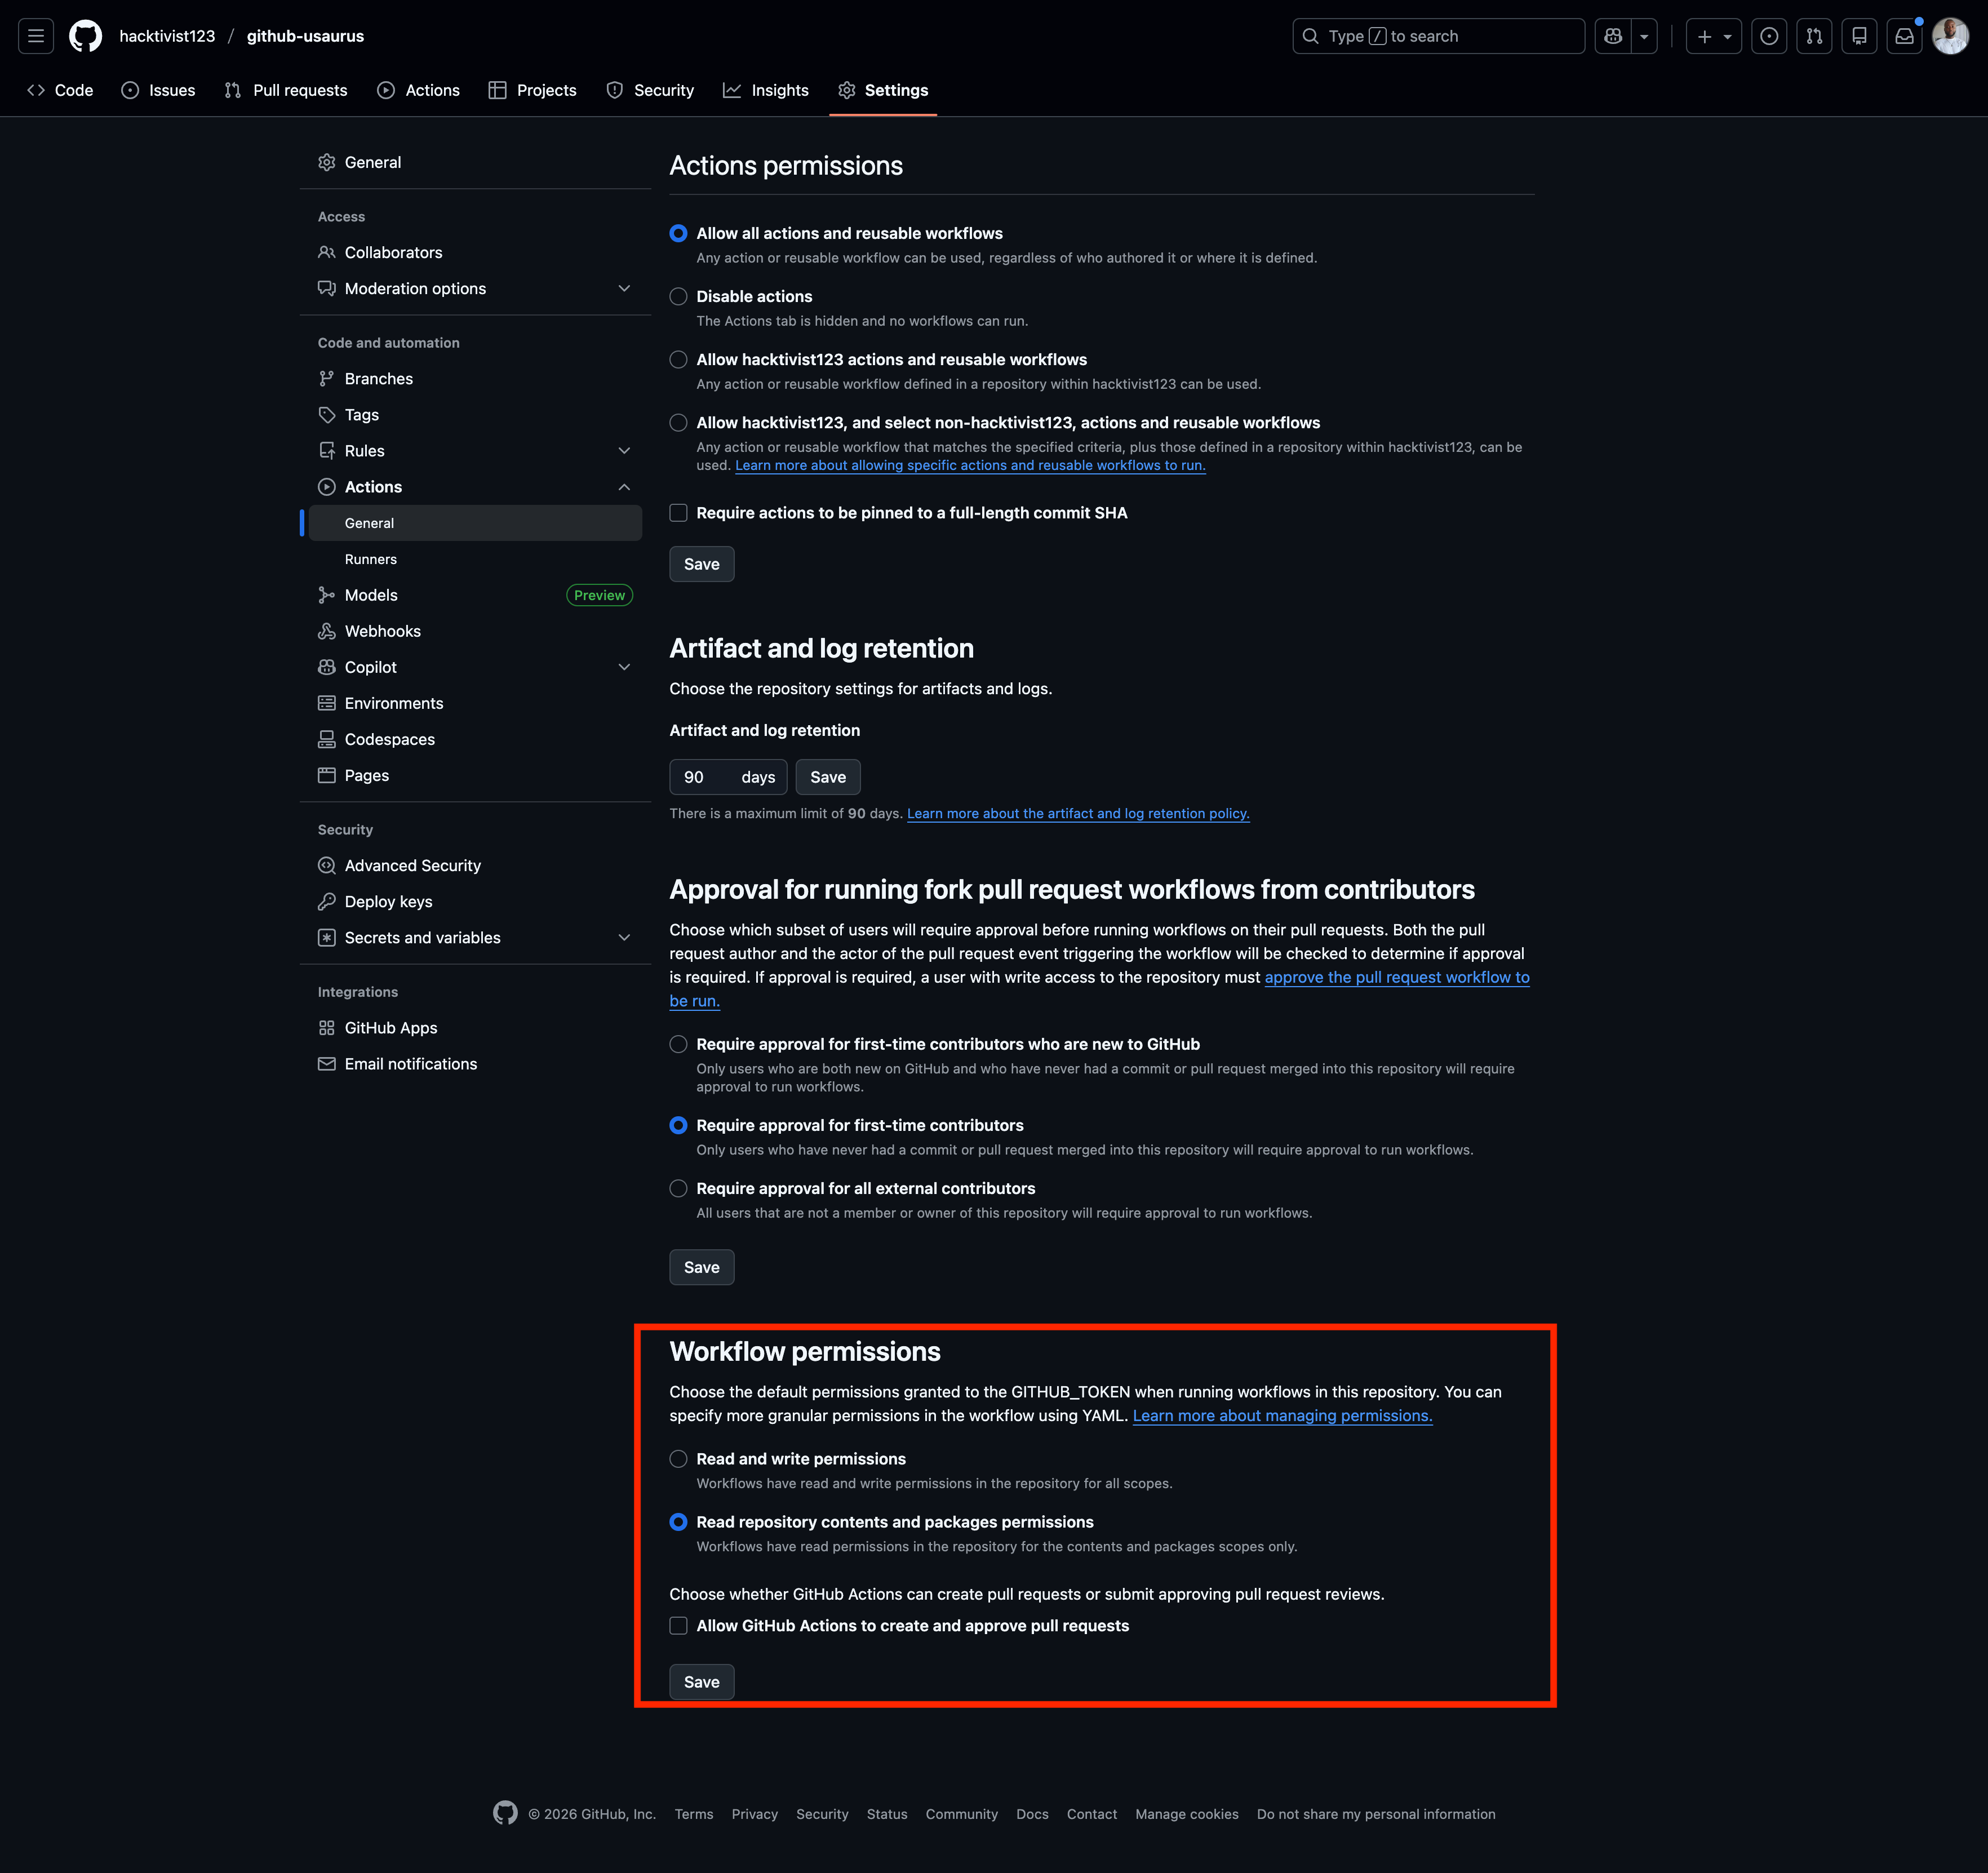
Click Actions in the left sidebar, then click General.
-
Scroll down to Workflow permissions and select Read repository contents and packages permissions.
-
Click Save.
Enable GitHub Pages with GitHub Actions
-
In your repository settings, click Pages in the left sidebar.
-
Under Source, select GitHub Actions.
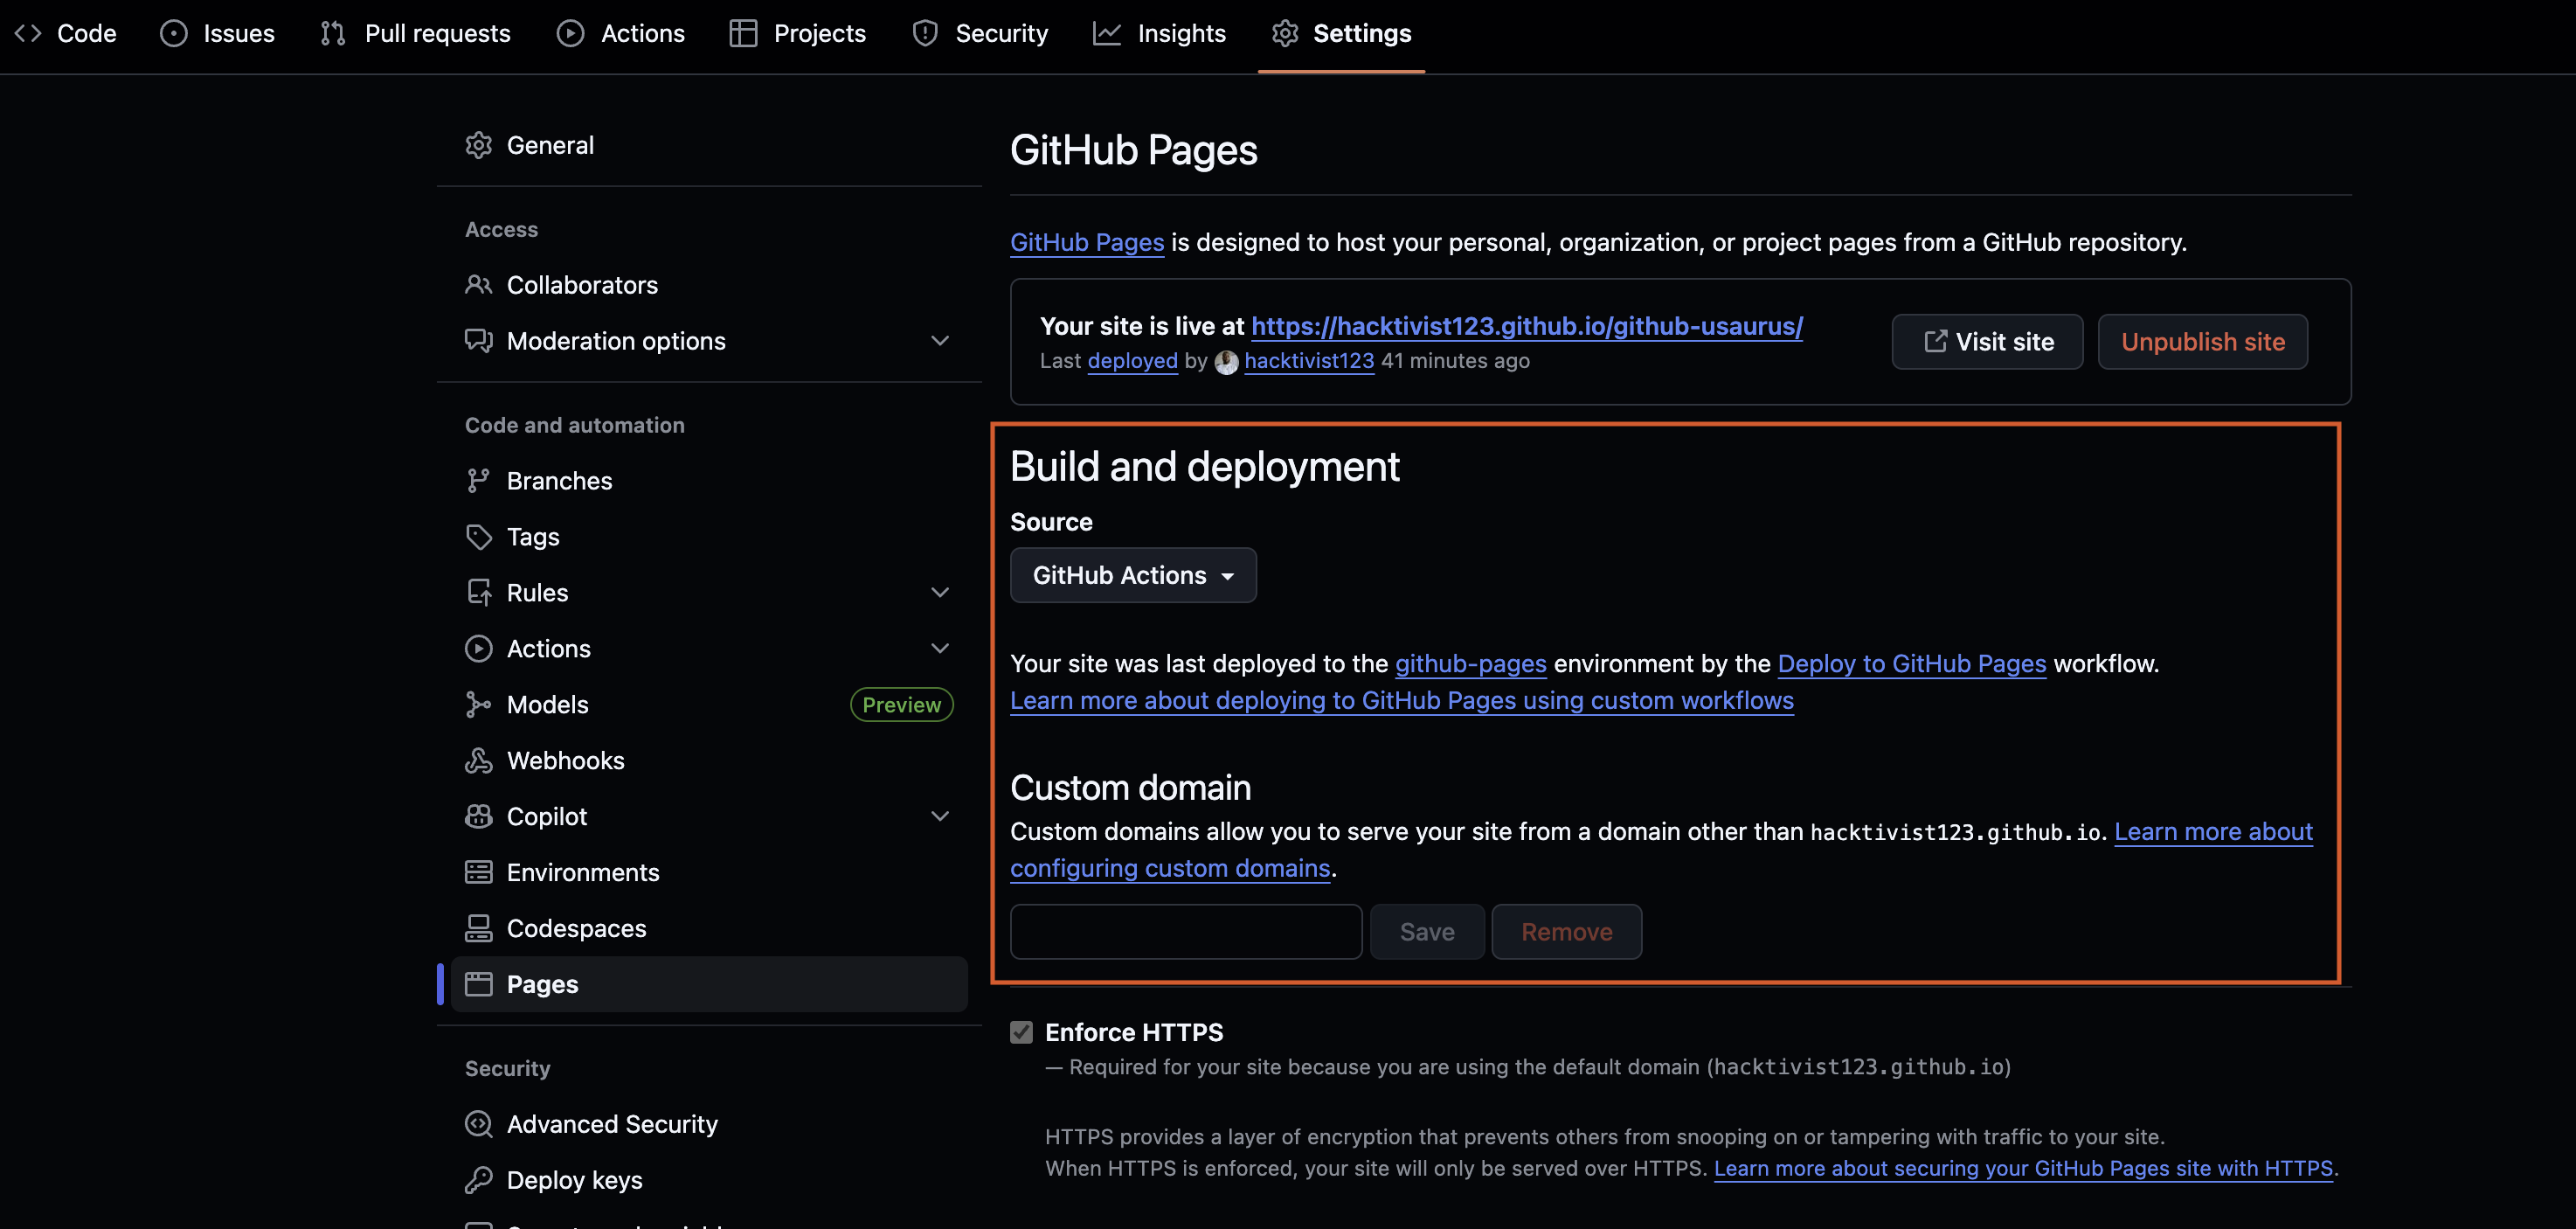
-
Click Save.
Trigger a deployment
-
Commit your workflow file and push it to GitHub:
git add .github/workflows/deploy.yaml
git commit -m "feat(github): add automated deployment workflow"
git push origin main -
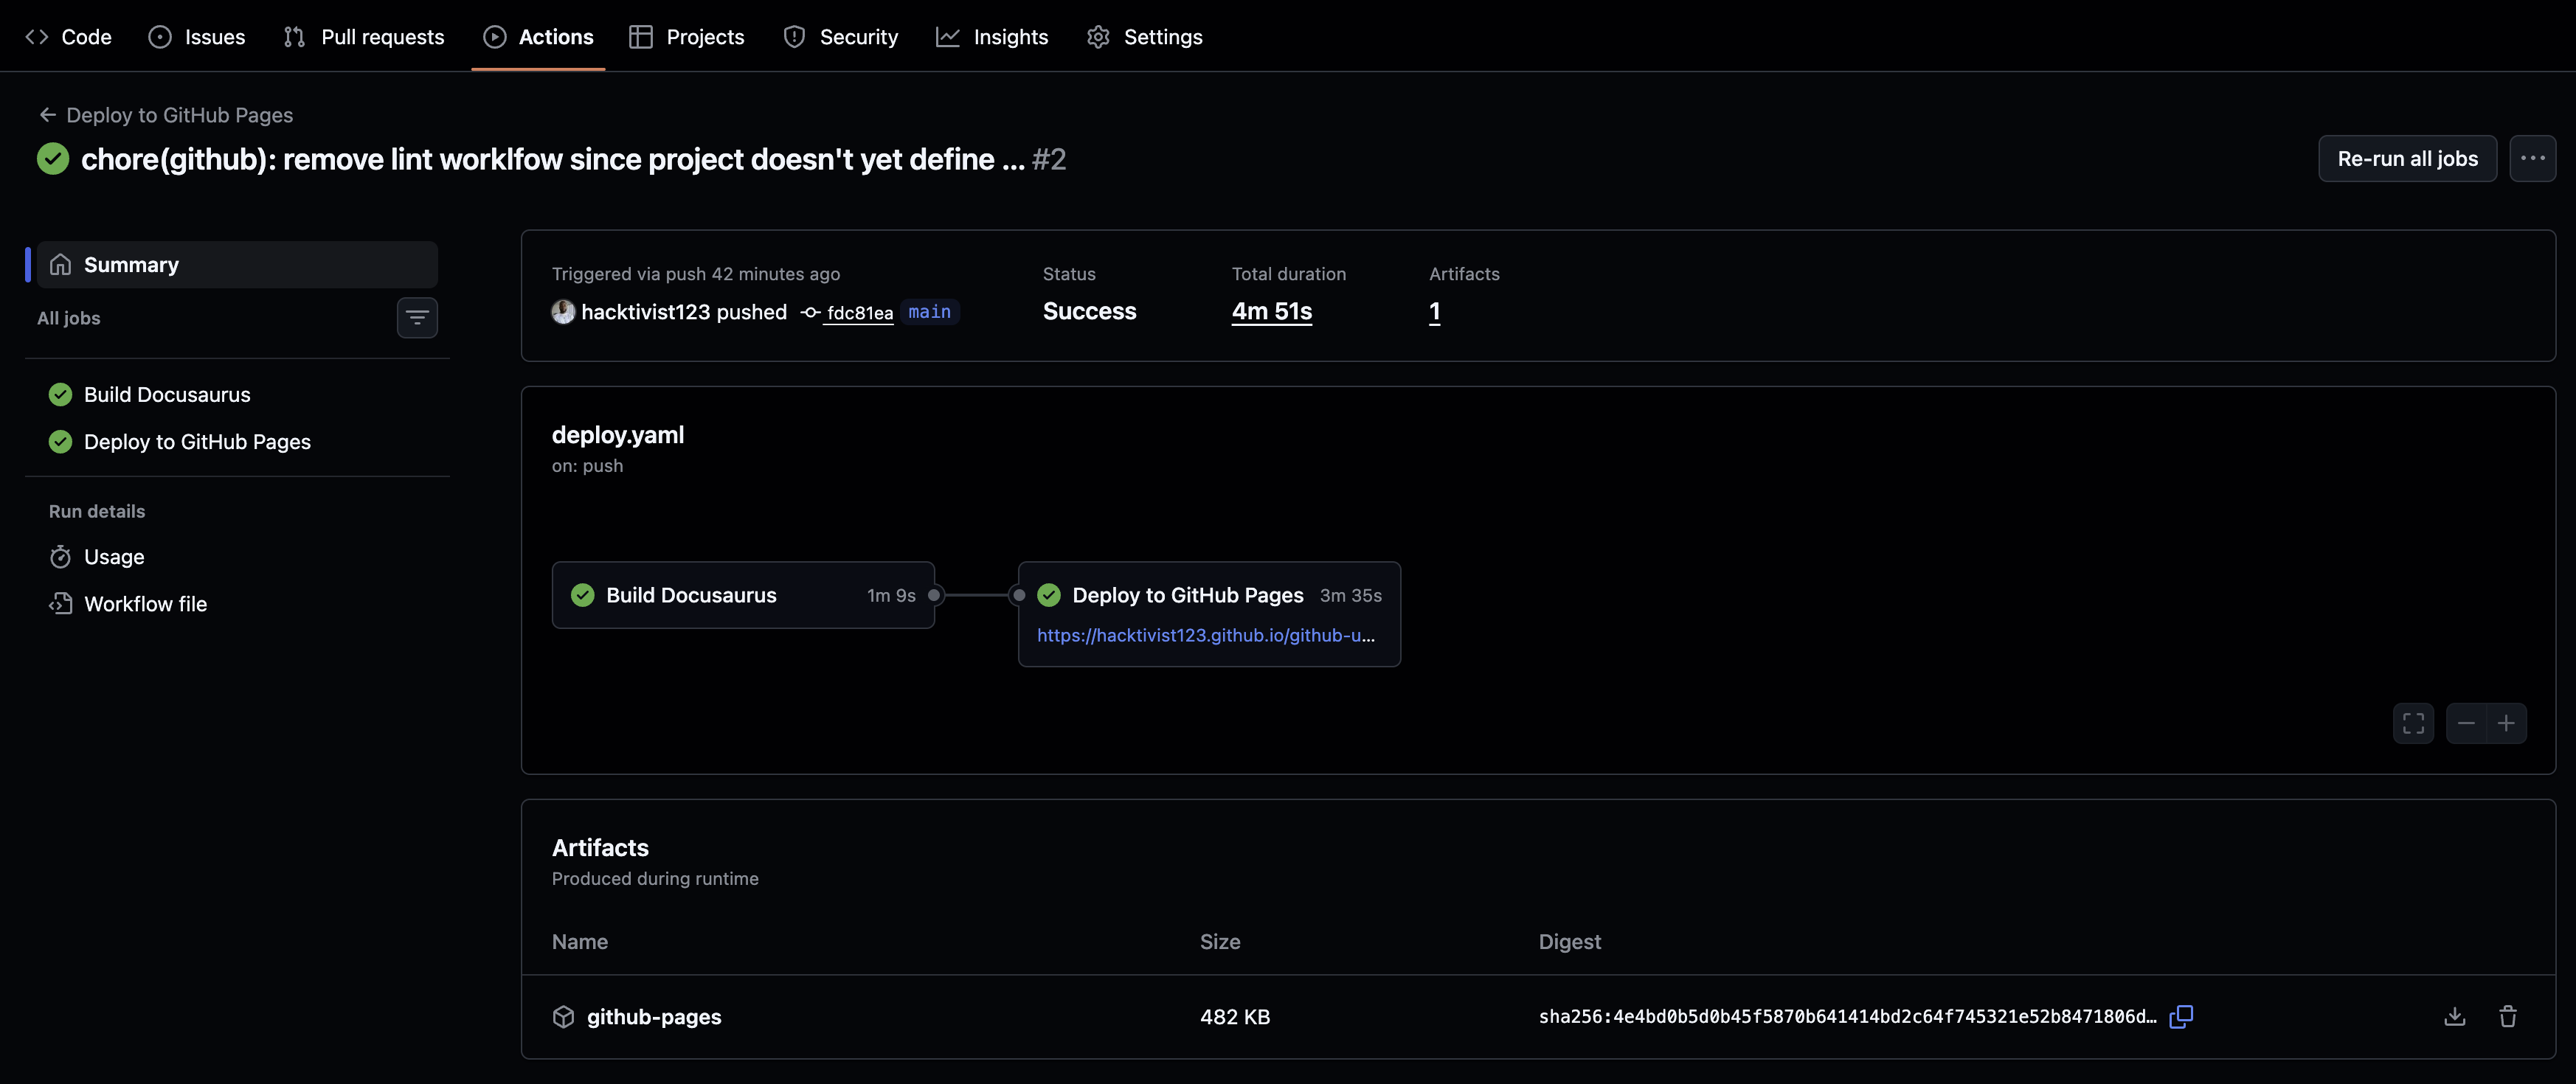
Navigate to the Actions tab in your GitHub repository to monitor the deployment progress.
-
Once the workflow completes successfully, your site will be live at
https://your-github-username.github.io/your-repository-name/. -
Click the generated link on the "Deploy to GitHub Pages" workflow or navigate directly to your site's URL.
Future pushes to your main branch will automatically trigger new deployments, keeping your documentation site up to date with your latest changes.
Summary
In this tutorial, you've now seen how to:
- Configure your Docusaurus site for GitHub Pages deployment
- Deploy manually using the
yarn deploycommand with environment variables - Automate deployments using GitHub Actions workflows
- Enable GitHub Pages and verify your site is live
Next steps
Consider completing some other common tasks with your Docusaurus site: